Categories
living green

How to take a greener road trip

greener road trip
“rushing” by Robert S. Donovan // CCBY


My family and I just returned home from a week of vacation, during which we took a road trip from Madison to Detroit. Road tripping might not be the greenest way to spend our vacation, but often it’s the transportation method that makes the most sense for our family. So I wanted to offer some tips for how you can use less energy on your next road trip.

Prepare your car

Cars run more efficiently when they are properly maintained, so go in and get your oil changed before you head out on your road trip. You can get a high efficiency oil filter that will help you get the best gas mileage during your drive. While you’re at it make sure your tires still have good tread and are properly inflated. Proper tire pressure will not only give you better gas mileage, but are also safer to drive on.

Pack lightly

A heavy car is going to need more gas to get around, so if you can lighten up your luggage, you’ll help gain some of those MPGs. I’m learning that this can certainly be difficult with a child in the picture. Turns out we didn’t even use the stroller on this vacation, we got along just fine with just a baby wearing carrier. Next time, unless we have specific plans, we’ll leave the stroller at home.

Check your route

Going from Madison to Detroit  we need to pass through Chicago, which seems to always mean getting stuck in traffic for at least a little bit. But it turns out that the optimal speed for gas mileage is somewhere between 50 – 60 miles per hour. On our way home, we saved ourselves the possible stop and go of the city and took one of the by-pass highways. We may have put a few more miles on the car, but we were able to skip the idling in traffic.

Drive smart

Not only does getting better gas mileage save you money at the pump, it also means you are releasing fewer lbs of carbon dioxide into the atmosphere with each trip. Once you’re on the road you can help increase those MPGs by using the windows instead of the air conditioner when you’re on city streets, but switching to AC with the windows rolled up once you hit about 50 miles per hour. Keeping a safe space between you and the car ahead of you not only gives you time to react to traffic, but also means you won’t necessarily be making quick stops, which can also burn up fuel.

Pack your own snacks

Gas station and rest stop food tends to be over packaged among other things. Packing your own snacks helps prevent waste, and gives you more options for road friendly food than the typical rest stop. We like to also bring a water bottle or two – for long trips we refill them at the rest stop drinking fountain.

Hopefully this list gave you a new idea or two about how you can make your next road trip a little greener.

Categories
building design energy

Amory B. Lovins on Integrative Design

I’m going to give you a little bit of homework before we get into the meat of this post. Watch this video:

(I’ve probably posted that before. I’m a wee bit obsessed with Mr. Lovins and his work)

Now let’s talk a little bit about integrative design. Integrative Design is a method of design based on working from the top down. Basically you look at the entire system – the entire car, the entire house, the entire factory, with the intention to make it as energy efficient as possible. By looking at design from the top down you ask how to make the best holistic design by intertwining the functions of the different components.

Integrative Design is different from traditional design methods which focus on optimizing each individual piece of the system and then fitting them together and adjusting how they interact. This traditional method creates the most optimized walls and plumbing and HVAC. But the integrative design approach allows you to say, what if we didn’t need the HVAC at all  (or at least not our idea of the most optimized HVAC) because we change the way we build the walls completely.

At the end of the Autodesk video Amory mentions the 10xE principles of integrative design, and I want to share those here:

  1. Define shared and aggressive goals.
  2. Collaborate across disciplines.
  3. Design non-linearly.
  4. Reward desired outcomes
  5. Define the end-use.
  6. Seek systemic causes and ultimate purposes.
  7. Optimize over time and space.
  8. Establish baseline parametric values.
  9. Establish the minimum energy or resource theoretically required, then identify and minimize constraints to achieving that minimum in practice.
  10. Start with a clean sheet.
  11. Use measured data and explicit analysis, not assumptions and rules.
  12. Start downstream.
  13. Seek radical simplicity.
  14. Tunnel through the cost barrier.
  15. Wring multiple benefits from single expenditures.
  16. Meet minimized peak demand; optimize over integrated demand
  17. Include feedback in the design.

In Amory’s lecture he talks about using integrative desing in building design for heating and cooling, in auto design for using less fuel, and in factory design for pumping fluid. Stay tuned for a bit of a deeper dive into these topics in the future, including how the integrative design principles lead to radically different approaches in each of these categories.

Categories
living green

Things making me go wtf this week

The Joy Cardin show on Wisconsin Public Radio had a local meteorologist as a guest on Friday morning to talk about the changing season and what sorts of weather to expect this fall and winter.  A guest called in asking if global warming is really caused by humans (insert massive eye roll and side eye here), and the meteorologist dodged the question by saying he didn’t think there was enough scientific knowledge yet to decide one way or another. He also said that he thought it would take us 50 to 100 years to make a decisive scientific verdict on the question. When people called in to continue  the discussion (and presumably to correct this man’s view of where the science stands) Joy stated that the purpose of the show was to talk about the weather, the season changing, and what to expect for this years winter, and they would not be taking call-ins regarding climate change. She then let the meteorologist re-state his dodgy stance that we just don’t know yet, we don’t have the science yet.

I had to change the radio station a couple times during this drivel because I was driving and I could feel my blood pressure sky rocketing as I rage-listened to this meteorologist.

It turns out that the this meteorologist’s view point is not uncommon among meteorologists. So here is an important public service announcement: Meteorologists are not climate scientists. They are NOT EXPERTS IN THE FIELD OF CLIMATE SCIENCE.

The Joy Cardin show was followed by NPR’s On Point, during which Tom Ashbrook covered the recent report showing that CO2 numbers in the atmosphere are soaring at a record rate.

Can we please stop giving climate change deniers a public platform? The science has shown every time that rising CO2 levels in the atmosphere are causing global warming, and the rate that CO2 levels have risen since the industrial revolution is unprecedented. This isn’t a question anymore, folks. Shouldn’t this meteorologist have been vetted on the subject before hand? Joy Cardin’s producers couldn’t have honestly thought that if they had a meteorologist on the show the subject of climate change wouldn’t come up, could they?

And now, to make me feel a little bit better about this whole thing: Who’s a Climate Scientist?

Categories
building energy

Tell Me More About Energy Star

Chances are you’re familiar with the blue and white logo that can be found on many types of home appliances, but do you know what being Energy Star certified actually means?

The Energy Star program was started by the Environmental Protection Agency and the Department of Energy in 1992 as a labeling program for energy efficient appliances. Energy Star is now an international standard for energy efficiency. The Energy Star label can now be applied to computers, servers, appliances, heating and cooling systems, home electronics, imaging equipment, lighting, and new homes and buildings.

In 2010 it came to light that the Energy Star label was being wrongly granted and misused. It was being granted to products that did not exist, and if a company had one product certified they were able to download the label and put it their other, non-certified products as well. Since then, a number of critical audits were completed, and the Energy Star label and certification process has been revamped to prevent these sorts of fraudulent claims.

Now each application is reviewed for approval. Products must be third-party tested in EPA approved labs. Additionally, each year off-the-shelf tests are conducted on a percentage of Energy Star labeled products to ensure that the consumer is receiving products that meet the standards.

So what does it mean if something has and Energy Star label

Each product has a set of standards that it has to meet in order to receive the label. For example, a refrigerator must save 20% of energy based on the industry minimum standard, an air conditioner must save 10%, and a light bulb must save 75% vs a standard incandescent. These standards are updated every couple years or so, in particular when at least 50% of the market is held by energy star labeled products.

The Energy Star label and buildings

There are currently Energy Star ratings for new homes, commercial spaces, and industrial plants. Buildings are evaluated for the energy efficiency of their heating and cooling systems, water management, and air quality. Buildings are evaluated by professional engineers or registered architects and have to receive a rating of 75 or higher (out of 100) in order to receive an Energy Star label.

Categories
energy living green

LED Light Bulbs

I hope you all had a lovely long weekend. Between the Holiday and adjusting to the ever changing schedule that is medical residency, Tuesday’s post got away from me. I hope you didn’t miss my wrap up on light bulbs too much. 

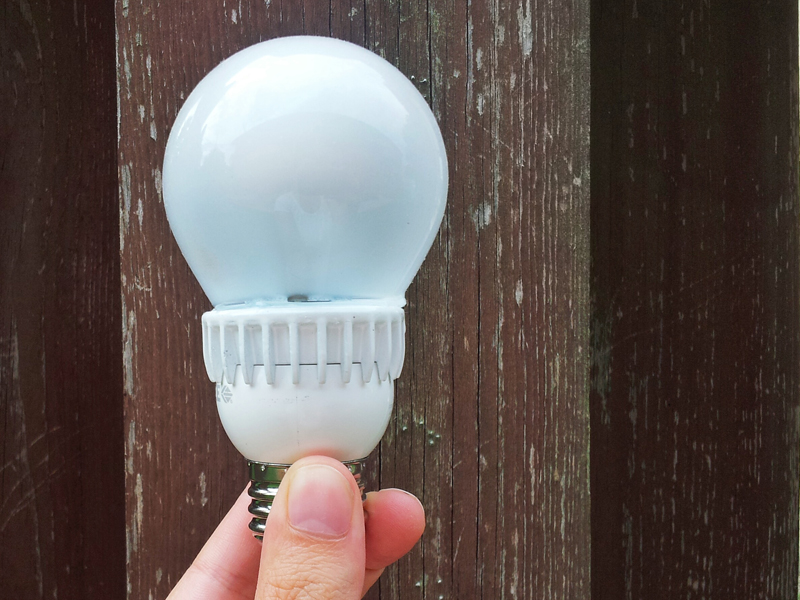
LED Light BulbLED stands for Light Emitting Diode. LEDs are comprised of a semiconductor material and two leads. Basically what happens is that when the LED is connected to a circuit, a voltage is applied to the leads. This provides enough energy for electrons to jump across the band gap, and when they do, they release energy in the form of photons, or light. The color of light emitted by the LED is determined by the band gap in the semiconductor. If all this talk of semiconductors sounds vaguely familiar, it’s because it’s the same concept behind solar cells. Only in this case, the energy is coming from the wall rather than from the sun. LEDs are great as far as energy efficiency goes because they require a very small amount of electricity to produce light. They are also compact, robust, and have long lifetimes. LED light bulbs are made up of a collection of LEDs designed such that they emit a white, or slightly yellow light. Recently LED light bulbs have become increasingly available for home lighting, so let’s see how they compare to Incandescent and CFL light bulbs.

  • Light Quality: Mixed Reviews. Like CFLs I have frequently read reviews that LED light bulbs produce light that is too cold. We can probably all easily identify LED holiday lights because they have that tell-tale blue tinge to the light. I am happy to report that the LED light bulbs that I recently purchased produce a warm soft light, just like we expect are accustomed to seeing from incandescents. LED light bulbs will probably need to become more mainstream before they beat the cold blue light rap.
  • Price per bulb: Con. Standard LED light bulbs typically run $10 a bulb. If you buy them in a six-pack you can get them for more like $9, but there is definitely a bit of sticker shock that comes with spending over $50 on lightbulbs just for your home use. And if you want anything fancy, like a dim-able bulb, you’ll easily be paying double.
  • Availability: Pro. You may not be able to find LED light bulbs on the shelves of your local grocery store yet, but Target, Home Depot, and Amazon all carry them, and I imagine many other stores as well.
  • Style: Con. Similar to CFLs, LED light bulbs fit standard sockets, but the choice of bulb is limited. There are candelabra bulbs, but they don’t look the same as the incandescent equivalent.
  • Energy use: Pro. An LEDbulb that produces a comparable amount of lumens as a 60 watt filament bulb requires only 9 watts.
  • Lifetime: Pro. 25,000 hours! You read that right, a LED bulb will last more than 3 times as long as a CFL bulb. That translates into nearly 23 years of light at 3 hours a day. The LED light bulb that I recently put in our lamp will burn for longer than my youngest brother has been alive. That’s crazy town.

And bonus: LED light bulbs contain mostly recycle-able materials. Contact your local recycling provider to see if they can recycle your old bulbs. Although, you can probably wait 20 years  or so before you have to deal with that.

So the tally when comparing LEDs to CFLs and Incandescents is 3 pros, 2 cons, and 1 mixed review. Now let’s look at the long term cost.

10 year cost for burning filament bulbs in one lamp: (3 hours a day, $0.12/kwh cost of electricity, $9.00/bulb, 1 bulb) = $20.83.

And bonus: that same bulb will burn for another 13 years at that rate.

Pretty cheap when compared to the $96.84 it would cost to run the same light with a incandescent bulb, and it even beats out the $22.40 for the CFL. 

And more importantly, over that same 10 years you could save 550 kWh of electricity if you switch from an incandescent light bulb, or 55 kWh if you switch from a CFL.

Categories
living green

Canning A Little Bit Greener

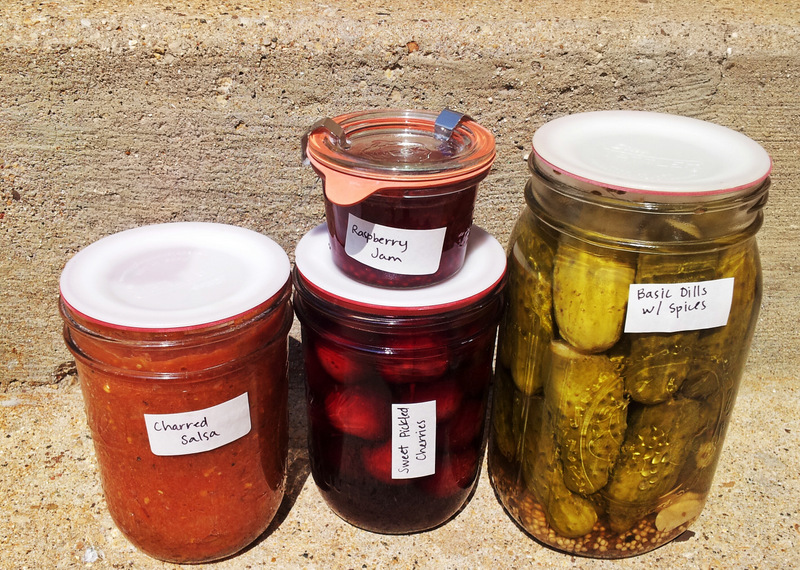
Reusable Canning LidsI’ve been a pretty serious canner for 3 or 4 years now, and don’t see myself stopping anytime soon. In fact, during the summer I’m continuously checking out my jar supply and trying to figure out if I’ll need to supplement this year. The answer always seems to be yes. My family loves pickles and salsa. We use crushed or diced tomatoes as a base for pizza sauce or in chili all winter. Applesauce made to the perfect consistency and with only 2 ingredients is a wonderful dinner side-dish in a pinch, and also makes a great grab and go for the last minute pot-luck. And I’ve started getting more into jams. Seriously, homemade raspberry jam is pretty much sublime.

And every year I find myself scrambling to make sure I have enough lids. I have rings coming out my ears, since those are reusable, but it kills me that I only get one use out of the standard ball canning lid. So I started looking into if there was a reusable option for the lids as well. It turns out there are a couple options to make my canning habit greener, at a range of prices.

Reusable Canning Lids

Le Parfait makes high end canning jars with hinge lids and rubber gaskets. These jars, or others like them are on my “someday” list. They come in a wide variety of sizes, including 2 and 3 liter sizes, which might be a little impractical for water bath canning, but would be excellent for holding fermented foods in the fridge or for storing dry goods.

Weck makes some gorgeous options. They come with a glass lid, a rubber gasket, and some metal clips to hold it all securely in place while canning. Most of what they offer seems to be primarily designed for jellies and jams – preserves that are well suited to smaller jars or tall and narrow jars. A good friend gave us a few jams in weck jars as part of a baby/new-parent gift, and not only were the jams delicious, but I’ve been smitten with the jars ever since.

What I ultimately decided to go with for now are these Tattler reusable canning lids. The lids are made of BPA free plastic, and come with rubber gaskets. They fit all the mason jars I already have and pair easily with all those rings I have lying around for canning. So far I love them, and it makes me so happy to know that I’ll get year after year of use out of them instead of one-and-done.

Do you have any household habits or hobbies that you’ve recently made greener?

This post contains affiliate links.

Categories
design energy

CFL Light Bulbs

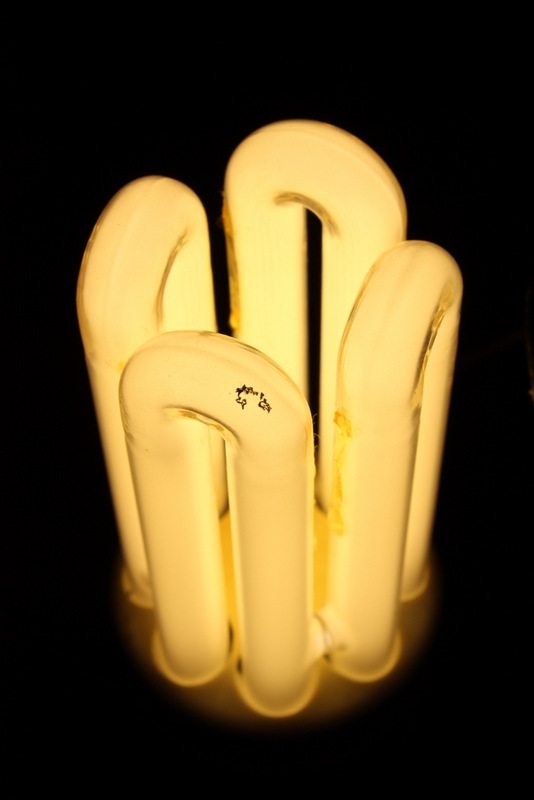
CFL or compact fluorescent lamp light bulbs are pretty typical these days. A CFL bulb is made up of a ballast and a tube containing gas. The ballast turns the current from the wall outlet into high frequency current, which it sends into the gas tube. The high frequency current knocks excites electrons in the gas, causing them to produce ultraviolet (UV) light. When the UV light hits the fluorescent coating on the glass tube it produces visible light.

CFL light bulb
Light Bulb” by Pedro Lozano CCBY

Let’s compare CFL light bulbs directly to the pro and con list I put together last week about incandescent bulbs:

  • Light Quality: Mixed Reviews. The light quality can be all over the board with different brands of CFL light bulbs. We’ve grown accustomed to the warm, soft light produced by incandescent bulbs, and in comparison, some brands of CFL bulbs can produce cold, harsh light. However, many brands have improved their designs to provide warm light just like incandescent bulbs. You may have to shop around a couple brands to find the light quality that meets your expectations.
  • Price per bulb: Pro. While more expensive than filament bulbs, you can pick up CFL bulbs for around $2 per bulb.
  • Availability: Pro. You can get basic CFL bulbs pretty much everywhere you can get filament bulbs these days.
  • Style: Con. While CFLs fit pretty much any standard light bulb socket, you’ll have trouble finding specialty shaped bulbs of the CFL variety.
  • Energy use: Pro. A CFL bulb that produces a comparable amount of lumens as a 60 watt filament bulb requires only 14 watts.
  • Lifetime: Pro. 8000 hours! Which translates into about 7 years of burning for 3 hours a day.

And one more important point to consider when using CFL bulbs:

  • Toxicity and Disposal: Con. The gas inside the CFL tube contains mercury which is hazardous to come in contact with. This means you have to be careful not to break open the tube, and you really should not just be disposing of a CFL bulb in the trash. Used CFL bulbs should be disposed of by bringing them to an appropriate drop site for safe disposal.

If you’re looking for a disposal site near you, you can check out search.Earth911.com

So the tally when comparing CFLs to Incandescents is 4 pros, 2 cons, and 1 mixed review. Now let’s look at the long term cost.

10 year cost for burning filament bulbs in one lamp: (3 hours a day, $0.12/kwh cost of electricity, $2.00/bulb, 2 bulbs) = $22.40.

Pretty cheap when compared to the $96.84 it would cost to run the same light with a incandescent bulb.

Categories
apartment living living green

Simple Green Homemade Laundry Detergent

homemade laundry detergent
So we moved recently, and as is often the plague of the renter, we have found ourselves with a new pay-per-wash laundry situation. The washer in our building is your standard top loader, although its basin is slightly larger than standard. The way this washer is set up, you load it up with clothes and soap, close the lid, choose your settings, and hit start. Once you hit start the lid locks. And THEN the water starts. This means that you can’t start the water and put the soap in before loading, which allows you to start dissolving the powdered laundry detergent a little bit.

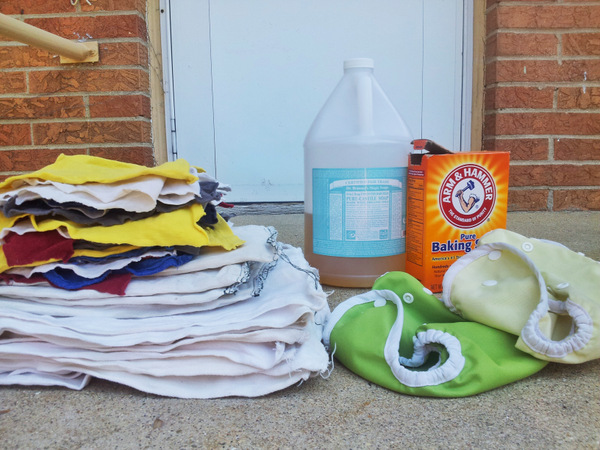
You may recall from my post on cloth diapers, that we’ve been using 1/4 cup liquid Dr. Bronner’s castile soap and 1/2 cup baking soda to do our wash. We used this combination successfully for 3 years at our last place. If you have a top loader where you can start dissolving the baking soda before loading all your clothes in, I totally recommend this as a detergent. The castile soap worked wonderfully for getting our clothes clean, and the baking soda softened the water and kept everything fresh smelling. And once you turn away from the heavily fragranced store-bought detergents, you’ll suddenly realize how overpowering those fragrances are.

However, with this new setup, without the ability to start dissolving the baking soda, we were finding baking soda deposits on all our laundry. It didn’t ruin anything, but white streaks on your dark clothes that are supposed to be clean is just no fun. So I decided to switch it up, and see if we could find a new homemade laundry detergent recipe that uses less baking soda. I was also interested in trying a detergent using bar soap instead of liquid soap, because the Dr. B’s bar soap is much cheaper than the liquid.

So after doing some googling, and reading some of our homesteading faves, I decided to try out a pretty simple recipe – washing soda and grated bar soap.

What is washing soda? you may ask. Well, it’s sodium carbonate – one less carbonate than sodium bicarbonate aka baking soda. And, you can make it pretty simply from baking soda. Washing soda is a good deodorizer and water softener, like baking soda, but it is also useful for stripping oil and wax. It is a bit of a harsher chemical than baking soda, so don’t ingest it and keep it out of little hands. Unless your a grown person with little hands… Use your best judgement. You can make washing soda by taking a few cups of baking soda, spreading them on a cookie sheet, and baking it in the oven at about 400 F for an hour. The heat causes a chemical reaction that releases water and carbon dioxide, turning your baking soda into washing soda.

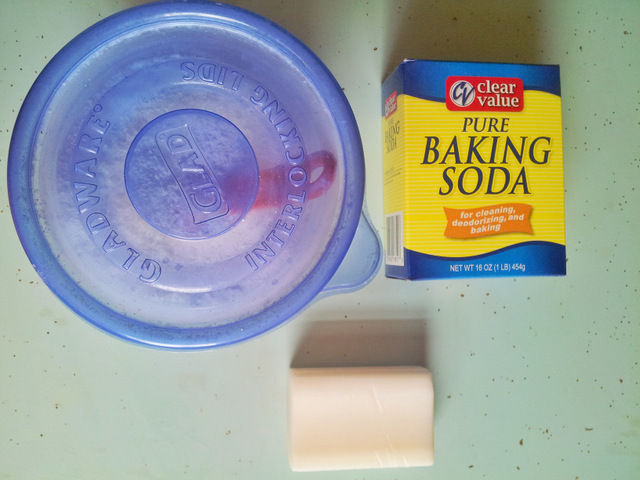
homemade laundry detergent components

For the laundry detergent:
2 cups washing soda
1 bar (5 oz) castile soap

  1. Grate the soap with a cheese grater or in a food processor. At first I was like, maybe I should get a special grater just for the soap. But then I realized that this is the exact same soap that I use to wash my dishes, in bar form. So I just used my regular cheese grater. And I used the second smallest holes.
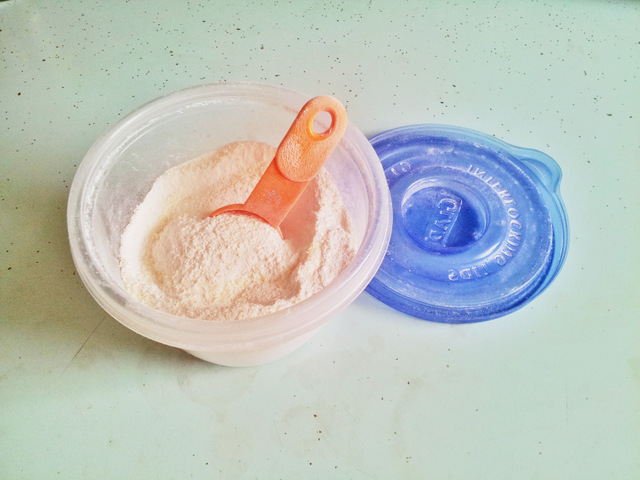
  2. Mix the now powdered soap with the washing soda. The washing soda is really fine, and you don’t really want to breathe it in, so to do this I put it all in a tuperware, put the lid on it, and shake it up.
  3. Washing soda can pretty easily absorb water and carbon dioxide from the air, which turns it back into baking soda. So store your laundry detergent in an air tight container. I just use the same tuperware that I mixed it up in.
  4. For the wash, use 2 heaping table-spoons for each load.

I’ve used this new homemade laundry detergent a handful of times already, and it’s passing the test so far. Our clothes are coming out clean and fresh, and no baking soda streaks! And it is definitely still powerful enough to get rid of the ammonia smell of wet diapers, even though I’m using so much less.


Categories
energy

Incandescent Light Bulbs

Shortly after we moved one of our lamps burnt out. The light bulb was the last of an old 6 pack of filament lights that we finally used up. For a while now, one of the items on our green living to-do list has been to upgrade to LED light bulbs, but since I already had that old pack of filament bulbs, we had to use those up first. Because one of our rules is use what you already have first.

So I ordered a 6 pack of LED lights. Maybe overkill considering we only have 2 lamps and these things have a 10 year guaranteed life. Real talk: sometimes I let the discount for buying in bulk counteract our desire to have less stuff. I need to work on that.

Anyhow, today I’m going to do a compare and contrast on the three most common types of light bulbs, so that next time you need to replace one, you can make the best choice.

Incandescent Light Bulbs

I mean, let’s hand it to Thomas Edison, this design for an electric light bulb has been around since 1878. Edison wasn’t the first to make a bulb that used a filament – about 20 others had done so with varying degrees of success starting in 1802 – but Edison’s design using a carbon filament had a long life and was the one that took off commercially. Filament lights work by passing an electric current through a material known as the filament. Today, filaments are typically made of tungsten.

Pros:

  • Light Quality: Incandescent light bulbs produce the warm, soft light we’ve come to expect from our lamps.
  • Price per bulb: Incandescent light bulbs typically cost about $1 – $2 per bulb
  • Availability and style: You can easily pick up a filament light bulb at a grocery store, convenience store or hardware store. And you can get a wide variety of sizes and styles. If you have a chandelier that takes specially shaped bulbs, they are most likely going to be Incandescent light bulbs.

Cons:

  • Energy use: A standard 60 watt incandescnet light bulb produces anywhere from 600-800 lumens. Lumens are the unit that the amount of visible light is measured in. As suggested, to do this it takes 60 watts of electricity flowing through the filament. Newer, more efficient filament bulbs claim to produce the same amount of lumens using about 45 watts, but that is still significantly more energy than other light bulbs require.
  • Fragility: Filaments are rather delicate things. If jostled too strongly, the filament can get dislodged or break without even being lit.
  • Lifetime: A 60 watt bulb will burn for about 985 hours. This translates to around 11 months of use if lit for 3 hours each day.

10 year cost for burning incandescent light bulbs in one lamp: (3 hours a day, $0.12/kwh cost of electricity, $1.50/bulb, 12 bulbs) = $96.84

You can find my report of the pros and cons of CFL light bulbs here, and LED light bulbs here to see how Incandescent light bulbs measure up.

Categories
living green

Cloth Diapers: 10 weeks – 5 months

Cheeks just hit 5 months this past week. This means we have about 150 days of cloth diapering experience under our belts. We’re hardly experts, but I do think we’re doing cloth diapers in a fairly minimalist, as green as possible, way. And in the interest of sharing how we live green, I wanted to share what we do.

cloth diapering

Background

Since every baby is different, and thus every family’s cloth diapering needs will be a bit different, I’ll start out with a little bit of background on Cheeks. He was a bigger babe from the onset, weighing in at 8 lbs. 14 oz. He wore newborn size clothes and diapers for 2 weeks at most. He is currently crushing the scale at 17 lbs 9 oz.

For the first 10 weeks or so we had a diaper service that provided clean pre-folds for us every week. We used our own wraps, so our process has remained pretty much the same. (I highly recommend this if you can make it work – cheaper than disposables, all of the benefits of cloth diapers, and no responsibility for washing and drying. Diaper services also do their washing and drying in bulk, which uses even less water resources than washing your own!)

So far Cheeks is still only eating breastmilk, so he’s not having solid poops yet. Our process might change once other food is in the mix. He has a poopy day about every 3 days or so, when he might produce 3-5 dirty diapers. In between poopy days he just wets.

Diapers, Covers and Wipes

cloth diapers and supplies

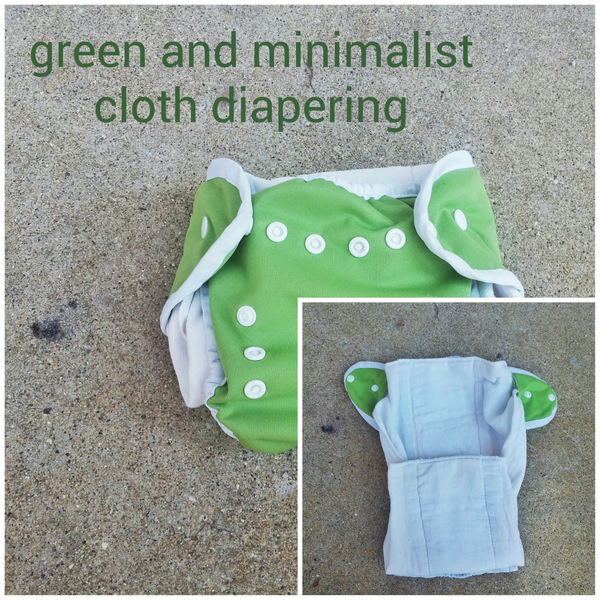
We use unbleached, organic cotton prefolds. Currently we have 12 infant size (12”x16”) prefolds and 24 standard regular (14.5”x20.5”) prefolds. The infant size is a bit thicker, and fit Cheeks as is. The standard regular size is a bit thinner, and since they are much longer, we double over the front to make them a thicker and to make them the right length.

We currently use Thirsties size 1 covers with snaps. We have 6 covers, and we love them. The tag on the size 1 says up to 18 lbs, but we probably have a bit longer than that before we need to get the size 2s.

We buy our diapers and covers through Diaper Safari.

We slip the corners of the prefolds into the corners of the covers, slip them under Cheeks’ bum, fold the front of the prefold around his legs, and snap the cover together around him. Then we make sure everything is tucked into the cover around his legs, and we’re good to go.

folding cloth diapers

For wipes, we cut up a bunch of old cotton t-shirts into rags, and just use water for clean up. We originally thought we would use a mild soapy soak for the wipes, but when Cheeks was born, the hospital just had us use washcloths and water, so we decided no need for any soap.

Washing and Drying

With 36 diapers and 6 covers, at 5 months of age we can typically go 2-3 days before we run out and need to do laundry. When we change Cheeks, the diaper, any wipes we use, and the cover (if necessary) go into a 5 gallon bucket with a lid. Conveniently, after about 2-3 days it is also full, so that’s the signal that we need to do laundry.

Right now, since the dirty diapers aren’t so bad, we wash the diapers, wipes, and covers, mixed in with our regular laundry. The diapers, etc. don’t make a full load, so we just fill up the washer with whatever else needs to be washed. We haven’t had any trouble with staining or stinking. We set the washer to cool water and a regular cycle.

We use the same laundry detergent for all our laundry – diapers included. For each load we use 1/4 cup of castile soap (Dr. Bronner’s is our personal choice), and ½ cup of baking soda. This works great at getting our laundry clean, fragrance free, and doesn’t include any additives that could build up on the diapers and cause diaper rash or problems with absorbency.

line drying cloth diapers

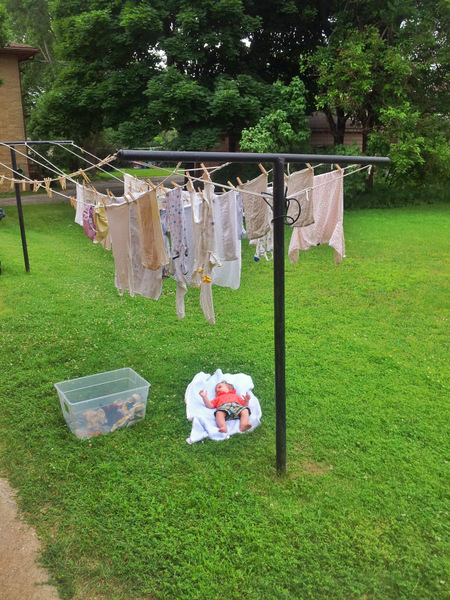
We line dry everything. In the summer our diapers (even the thickest ones) are dry in a few hours of sun, and the sun naturally bleaches any stains that may not have come out in the wash. Before we moved and had access to an outdoor clothes line, we hung our diapers on a drying rack indoors, and it took about 18-20 hours for them to dry out.


So, that’s how we do cloth diapering at 5 months. I’ll keep you updated if our process changes as Cheeks starts eating solid foods in the next few months.

This post contains affiliate links