Categories
living green

Canning A Little Bit Greener

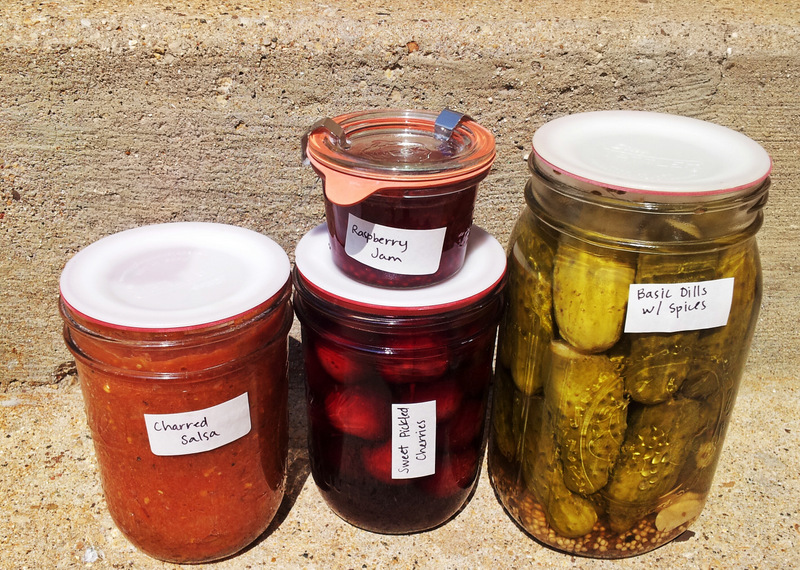
Reusable Canning LidsI’ve been a pretty serious canner for 3 or 4 years now, and don’t see myself stopping anytime soon. In fact, during the summer I’m continuously checking out my jar supply and trying to figure out if I’ll need to supplement this year. The answer always seems to be yes. My family loves pickles and salsa. We use crushed or diced tomatoes as a base for pizza sauce or in chili all winter. Applesauce made to the perfect consistency and with only 2 ingredients is a wonderful dinner side-dish in a pinch, and also makes a great grab and go for the last minute pot-luck. And I’ve started getting more into jams. Seriously, homemade raspberry jam is pretty much sublime.

And every year I find myself scrambling to make sure I have enough lids. I have rings coming out my ears, since those are reusable, but it kills me that I only get one use out of the standard ball canning lid. So I started looking into if there was a reusable option for the lids as well. It turns out there are a couple options to make my canning habit greener, at a range of prices.

Reusable Canning Lids

Le Parfait makes high end canning jars with hinge lids and rubber gaskets. These jars, or others like them are on my “someday” list. They come in a wide variety of sizes, including 2 and 3 liter sizes, which might be a little impractical for water bath canning, but would be excellent for holding fermented foods in the fridge or for storing dry goods.

Weck makes some gorgeous options. They come with a glass lid, a rubber gasket, and some metal clips to hold it all securely in place while canning. Most of what they offer seems to be primarily designed for jellies and jams – preserves that are well suited to smaller jars or tall and narrow jars. A good friend gave us a few jams in weck jars as part of a baby/new-parent gift, and not only were the jams delicious, but I’ve been smitten with the jars ever since.

What I ultimately decided to go with for now are these Tattler reusable canning lids. The lids are made of BPA free plastic, and come with rubber gaskets. They fit all the mason jars I already have and pair easily with all those rings I have lying around for canning. So far I love them, and it makes me so happy to know that I’ll get year after year of use out of them instead of one-and-done.

Do you have any household habits or hobbies that you’ve recently made greener?

This post contains affiliate links.

Categories
apartment living living green

Simple Green Homemade Laundry Detergent

homemade laundry detergent
So we moved recently, and as is often the plague of the renter, we have found ourselves with a new pay-per-wash laundry situation. The washer in our building is your standard top loader, although its basin is slightly larger than standard. The way this washer is set up, you load it up with clothes and soap, close the lid, choose your settings, and hit start. Once you hit start the lid locks. And THEN the water starts. This means that you can’t start the water and put the soap in before loading, which allows you to start dissolving the powdered laundry detergent a little bit.

You may recall from my post on cloth diapers, that we’ve been using 1/4 cup liquid Dr. Bronner’s castile soap and 1/2 cup baking soda to do our wash. We used this combination successfully for 3 years at our last place. If you have a top loader where you can start dissolving the baking soda before loading all your clothes in, I totally recommend this as a detergent. The castile soap worked wonderfully for getting our clothes clean, and the baking soda softened the water and kept everything fresh smelling. And once you turn away from the heavily fragranced store-bought detergents, you’ll suddenly realize how overpowering those fragrances are.

However, with this new setup, without the ability to start dissolving the baking soda, we were finding baking soda deposits on all our laundry. It didn’t ruin anything, but white streaks on your dark clothes that are supposed to be clean is just no fun. So I decided to switch it up, and see if we could find a new homemade laundry detergent recipe that uses less baking soda. I was also interested in trying a detergent using bar soap instead of liquid soap, because the Dr. B’s bar soap is much cheaper than the liquid.

So after doing some googling, and reading some of our homesteading faves, I decided to try out a pretty simple recipe – washing soda and grated bar soap.

What is washing soda? you may ask. Well, it’s sodium carbonate – one less carbonate than sodium bicarbonate aka baking soda. And, you can make it pretty simply from baking soda. Washing soda is a good deodorizer and water softener, like baking soda, but it is also useful for stripping oil and wax. It is a bit of a harsher chemical than baking soda, so don’t ingest it and keep it out of little hands. Unless your a grown person with little hands… Use your best judgement. You can make washing soda by taking a few cups of baking soda, spreading them on a cookie sheet, and baking it in the oven at about 400 F for an hour. The heat causes a chemical reaction that releases water and carbon dioxide, turning your baking soda into washing soda.

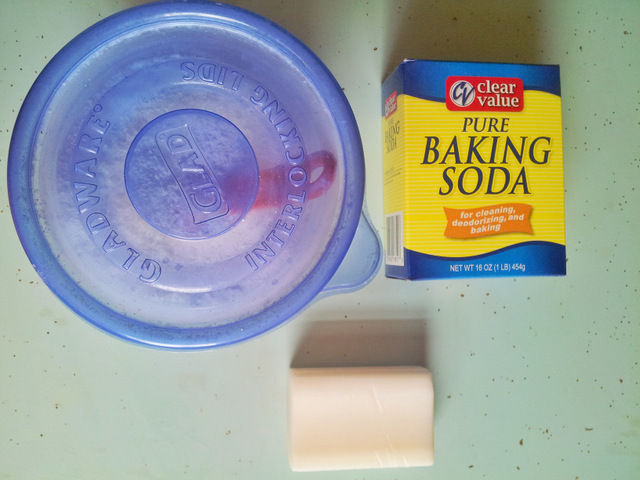
homemade laundry detergent components

For the laundry detergent:
2 cups washing soda
1 bar (5 oz) castile soap

  1. Grate the soap with a cheese grater or in a food processor. At first I was like, maybe I should get a special grater just for the soap. But then I realized that this is the exact same soap that I use to wash my dishes, in bar form. So I just used my regular cheese grater. And I used the second smallest holes.
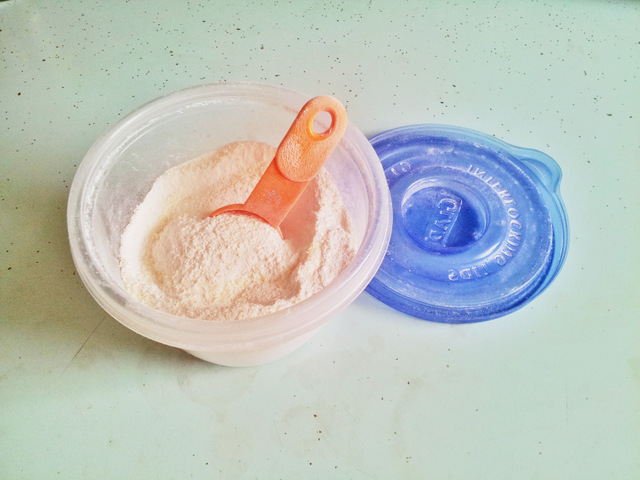
  2. Mix the now powdered soap with the washing soda. The washing soda is really fine, and you don’t really want to breathe it in, so to do this I put it all in a tuperware, put the lid on it, and shake it up.
  3. Washing soda can pretty easily absorb water and carbon dioxide from the air, which turns it back into baking soda. So store your laundry detergent in an air tight container. I just use the same tuperware that I mixed it up in.
  4. For the wash, use 2 heaping table-spoons for each load.

I’ve used this new homemade laundry detergent a handful of times already, and it’s passing the test so far. Our clothes are coming out clean and fresh, and no baking soda streaks! And it is definitely still powerful enough to get rid of the ammonia smell of wet diapers, even though I’m using so much less.


Categories
living green

Cloth Diapers: 10 weeks – 5 months

Cheeks just hit 5 months this past week. This means we have about 150 days of cloth diapering experience under our belts. We’re hardly experts, but I do think we’re doing cloth diapers in a fairly minimalist, as green as possible, way. And in the interest of sharing how we live green, I wanted to share what we do.

cloth diapering

Background

Since every baby is different, and thus every family’s cloth diapering needs will be a bit different, I’ll start out with a little bit of background on Cheeks. He was a bigger babe from the onset, weighing in at 8 lbs. 14 oz. He wore newborn size clothes and diapers for 2 weeks at most. He is currently crushing the scale at 17 lbs 9 oz.

For the first 10 weeks or so we had a diaper service that provided clean pre-folds for us every week. We used our own wraps, so our process has remained pretty much the same. (I highly recommend this if you can make it work – cheaper than disposables, all of the benefits of cloth diapers, and no responsibility for washing and drying. Diaper services also do their washing and drying in bulk, which uses even less water resources than washing your own!)

So far Cheeks is still only eating breastmilk, so he’s not having solid poops yet. Our process might change once other food is in the mix. He has a poopy day about every 3 days or so, when he might produce 3-5 dirty diapers. In between poopy days he just wets.

Diapers, Covers and Wipes

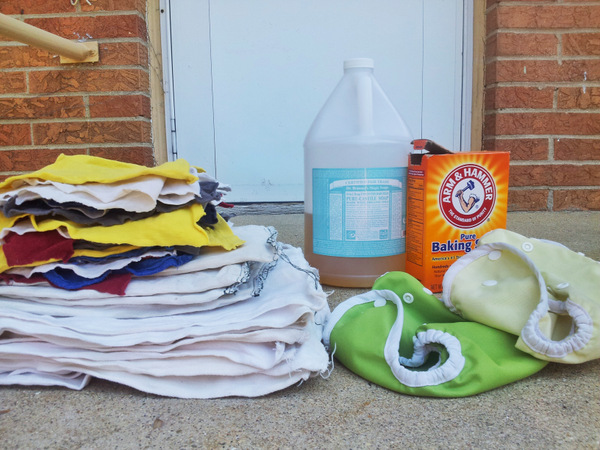
cloth diapers and supplies

We use unbleached, organic cotton prefolds. Currently we have 12 infant size (12”x16”) prefolds and 24 standard regular (14.5”x20.5”) prefolds. The infant size is a bit thicker, and fit Cheeks as is. The standard regular size is a bit thinner, and since they are much longer, we double over the front to make them a thicker and to make them the right length.

We currently use Thirsties size 1 covers with snaps. We have 6 covers, and we love them. The tag on the size 1 says up to 18 lbs, but we probably have a bit longer than that before we need to get the size 2s.

We buy our diapers and covers through Diaper Safari.

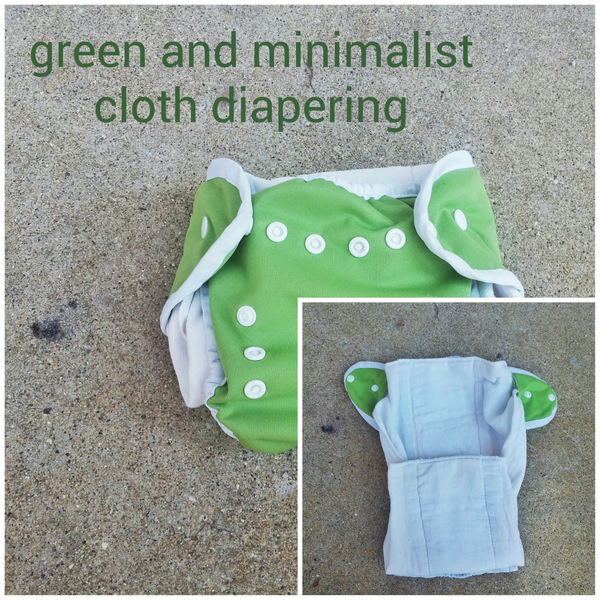
We slip the corners of the prefolds into the corners of the covers, slip them under Cheeks’ bum, fold the front of the prefold around his legs, and snap the cover together around him. Then we make sure everything is tucked into the cover around his legs, and we’re good to go.

folding cloth diapers

For wipes, we cut up a bunch of old cotton t-shirts into rags, and just use water for clean up. We originally thought we would use a mild soapy soak for the wipes, but when Cheeks was born, the hospital just had us use washcloths and water, so we decided no need for any soap.

Washing and Drying

With 36 diapers and 6 covers, at 5 months of age we can typically go 2-3 days before we run out and need to do laundry. When we change Cheeks, the diaper, any wipes we use, and the cover (if necessary) go into a 5 gallon bucket with a lid. Conveniently, after about 2-3 days it is also full, so that’s the signal that we need to do laundry.

Right now, since the dirty diapers aren’t so bad, we wash the diapers, wipes, and covers, mixed in with our regular laundry. The diapers, etc. don’t make a full load, so we just fill up the washer with whatever else needs to be washed. We haven’t had any trouble with staining or stinking. We set the washer to cool water and a regular cycle.

We use the same laundry detergent for all our laundry – diapers included. For each load we use 1/4 cup of castile soap (Dr. Bronner’s is our personal choice), and ½ cup of baking soda. This works great at getting our laundry clean, fragrance free, and doesn’t include any additives that could build up on the diapers and cause diaper rash or problems with absorbency.

line drying cloth diapers

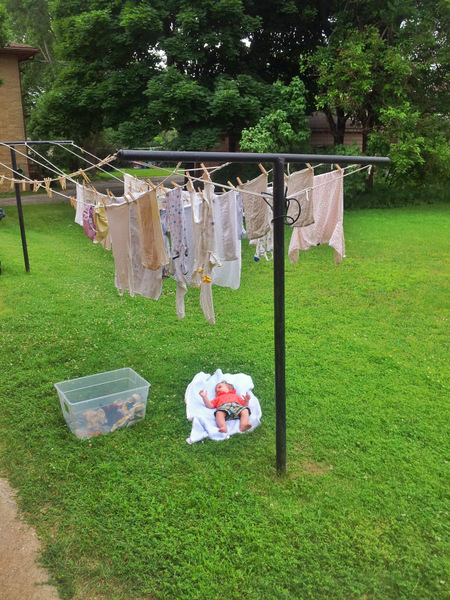
We line dry everything. In the summer our diapers (even the thickest ones) are dry in a few hours of sun, and the sun naturally bleaches any stains that may not have come out in the wash. Before we moved and had access to an outdoor clothes line, we hung our diapers on a drying rack indoors, and it took about 18-20 hours for them to dry out.


So, that’s how we do cloth diapering at 5 months. I’ll keep you updated if our process changes as Cheeks starts eating solid foods in the next few months.

This post contains affiliate links

Categories
apartment living living green

Settling in after Moving to Madison

Since moving to Madison 8 weeks ago, I think we finally have all our ducks in a row. We have new bank accounts, our mail is successfully forwarded, and we’ve fallen into a bit of a routine once again. Now that we’re a bit more familiar with our surroundings, I thought I would share a few of those green-living-to-dos that were on our list.

Compost

Around 35 million tons of food waste ends up in landfills every year. And while some of it does break down and get captured as methane, most of it, tied up in non-breathing plastic bags, just sits there. As I’ve mentioned before, composting is super important to me. So finding a way to compost our food waste is always on the top of my to-do list when we move.  Folks, we got lucky this time. One of the other apartment dwellers already had a compost bin set up in our backyard, so we’ve been able to share with them.  They also have a small garden plot in the yard, so they will be happy to reap the benefits of the compost pile we’re helping them build.

Energy

Madison Gas and Electric has a green power program, very similar to some of these energy companies, where for an additional 2.5 cents per kwh, we can purchase matching renewable energy for all the energy we use. MG&E’s green power is supplied by wind farms all across Wisconsin and Iowa.  When we started our service with MG&E we took a couple minutes on their website to find their green power tomorrow program and sign up for it.

Groceries

We prefer to buy as many of our dry goods in bulk as possible to reduce packaging. Unfortunately, the closest grocery stores to us do not have bulk bins. Whole foods does, but they tend to be a bit limited for our tastes. Luckily there is a food coop that is right on our way to and from the community garden that has extensive bulk bins. And, as a bonus, they mark down their produce that needs to be used right away. I think it’s pretty rad to see what they have in the marked down produce section and figure out if I could turn it into dinner for us that night or the next. We’ve also taken time to visit a number of local farmers markets and farm stands.  There are a number that are in walking distance almost every day of the week.


Categories
living green

Welcome!

Hi everyone! I’m happy to welcome you to buildingearth.net! As you may notice, I’ve moved all the building earth posts from macnamania over here. This is where I will be continuing to post all things green building and green lifestyle on Tuesdays and Fridays.

As you can see, I’m still working on brushing things up a bit over here, but I decided it was time to welcome you to this space, because you shouldn’t let the perfect be the enemy of the good.

So take a look around, and let me know if there are any topics you’d be looking forward to hearing about. I’ll be back Tuesday with some interesting building tricks used around the world for passive cooling.

photo: “Welcome” by Nathan CCBY

Categories
living green

Happy May Day

The weekend of or just after May 1st was always one of my favorites growing up. April in MN tends to still be pretty chilly, with the occasional snow storm – because it is, after all, “Minnesnowta”. But May, May is when it actually gets warm, when you’re actually safe to tuck your winter clothes away. The sun is gaining strength and the lilacs are about to bloom. And man, walking into a back yard lined with lilac bushes is so sweet in the spring. Intoxicating, almost. I think when you live in a place known for its winter weather, the welcoming of spring is so much sweeter.

And the artsy/hippy/inner-city neighborhood I grew up in celebrates May Day with flair. There’s a puppet theater in the neighborhood that puts on a May Day parade every year on the first Sunday of May. The parade is filled with fantastical creatures, lots of flowing fabric, tons of stilt walkers, and a healthy dose of social and political commentary, as May Day is not only a celebration welcoming spring, but also International Workers Day. When I was little, my dad would paint my face in preparation for the parade – usually my request was Siberian tiger. The parade route passed just a couple blocks away from my house, so we could walk to see it, and usually I could count on watching at least a little bit of the parade from my dad’s shoulders. The parade would lead everyone to the park, where we would watch a play about the earth welcoming the sun back for the spring. The play would culminate in the sun coming out from its hibernation on the island in the pond and sailing across the pond to warm the earth again. And there would be dancing and may pole decorating and good cheer.

I have such sweet memories of May Day as a child. Every year that I’m away I long to be back in Minneapolis for this celebration. It’s certainly one of those traditions that I hope to share often with Husby and Cheeks. These years that we are away we may just have to start making our own traditions, like delivering May baskets to our friends and neighbors!

Categories
living green

Some thoughts on Earth Day

Happy 44th Earth Day. And coincidentally, happy anniversary of the birthday of Vladimir Lenin. Did you know that when Earth Day was first celebrated in 1970 it was thought that the date was chosen because Earth Day was some part of a communist agenda? Actually, the date was chosen in conjunction with college students school schedules because Earth Day was originally a teach-in day for Earth friendly practices and peace.

When I was seven I won the Earth Day poster making contest that my school put on for my age group.  I can still remember the oversized squirrel I drew in my nature scene. What I really wish I could remember was the poem I wrote on the poster as well.  I’m sure it was a gem.

Today we’ll be celebrating Earth Day by (what else?) taking a trip to the community garden to drop off our compost and give the pile a good turn.  We’ll read Cheeks The Lorax too, for good measure.

I hope you take some time today to be thankful for this beautiful planet!

 This post contains affiliate links

Categories
living green

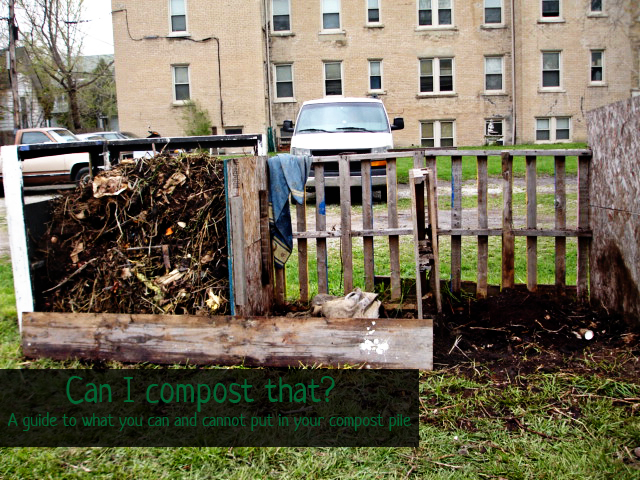
Can I compost that?

Can I Compost That?

Spring is in the air. The hyacinth are blooming. And you’re probably anxious to give your compost pile a turn. Or at least I am.

Have I mentioned before how much I love compost? Because I love it so much. Because it just does it. Compost just happens. And there is nothing we can do about it. Even when we try our best by putting our waste food into a tied up plastic bag and then sending that bag to be buried in a landfill, it’s still going to turn into compost – just compost that is now in a plastic bag and mixed in with all our other trash that doesn’t break down. And, may I ask, what good is it doing there?*

Have I inspired in you a love for compost yet? Are you itching to start your own pile yet? Or maybe you want to maximize the pile you’ve already started building?

There are plenty of guides on what you can or cannot put into a compost pile out there. I’m going to let you in on a little secret: Most of them are playing it safe and give you a very specific method of making your pile. This isn’t a bad thing. They will help you to build a pile and help you keep from attracting animals and upsetting your neighbors – both good things when it comes to the success of your compost. But compost just happens. Organic materials break down into humus naturally. When we build a compost pile we merely are helping it along.

So what can you put in your pile? Pretty much anything organic. What should you put in your compost pile? Well, depending on where you live and the size of your compost pile, maybe you should be a little more discerning.

Can I compost that? Residential area/small pile/community garden edition

In a residential area you probably don’t want to attract animals to your pile, because they will make a mess of it. You also probably want to keep the smells down from your pile because you’re a good neighbor. Small piles (less than 1 cubic yard) don’t really get hot enough to break some materials down quickly to prevent them from smelling, and smelly compost piles attract animals.

  • fresh kitchen scraps (fruits, veggies, egg shells)? yes! – chop it up and it will break down faster
  • produce that has gone bad? yes! it’s already started the process
  • lawn and garden clippings? yes! – cut it up small and it will break down faster
  • weeds? yes! if they haven’t gone to seed yet (otherwise your compost will end up full of weed seeds)
  • paper and cardboard? yes! if it isn’t dyed – tear it up and it will break down faster
  • cooked fruits/veggies/grains? not if they are cooked in oil, the oil will attract animals and smell
  • animal products (meat, bones and dairy)? not unless your ok attracting raccoons, crows, cats, dogs, etc
  • compostable “plastics” like those iced coffee cups? no! your pile is not big enough to properly break these down
  • chicken scat? yep! chicken poop is a great fertilizer, but it’s too strong to be applied directly to plants. Put it into your compost pile to break down for a while first.
  • coffee grounds? yes! coffee grounds are a great addition to your compost pile. In fact, I believe that adding coffee grounds to my indoor compost pile has helped keep the smell down and keep flies away.

Can I compost that? Rural area/large pile edition

If you are able to build a pile that is consistently 1 cubic meter in volume or larger, it probably has enough mass that it will get quite hot in the middle. This enables the pile to break down more complex materials quickly, preventing smelly, animal attracting results.  If you’re in a rural area, with greater distance between you and your neighbors, and plenty of wildlife around anyway, you may not care so much about the odor of your pile. Just keep it a bit further away from your house and garden.

  • fresh kitchen scraps (fruits, veggies, egg shells)? yes! – chop it up and it will break down faster
  • produce that has gone bad? yes! it’s already started the process
  • lawn and garden clippings? yes! – cut it up small and it will break down faster
  • weeds? yes! if they haven’t gone to seed yet (otherwise your compost will end up full of weed seeds).

If you have a big, hot pile it can handle weeds that have gone to seed. The heat will kill the seeds.

  • paper and cardboard? yes! if it isn’t dyed – tear it up and it will break down faster
  • cooked fruits/veggies/grains? yes! your big pile will take care of the smell
  • animal products (meat, bones and dairy)? yes! but don’t put chicken or fish bones into the pile unless they are ground up. These bones can shatter and be very dangerous if eaten by loved pets or wildlife
  • compostable “plastics” like those iced coffee cups? no! your pile is not big enough to properly break these down

Wait! Compostable plastics shouldn’t go in either of the types of compost piles mentioned above? It’s true, unless the cups are going into huge scale compost piles – like the kind that are built from city-wide compost projects, the pile does not get big/hot enough to break down this material and actually compost it. Otherwise the cup will break apart, but the flakes of plastic will remain intact in the humus.

  • chicken scat? yep! chicken poop is a great fertilizer, but it’s too strong to be applied directly to plants. Put it into your compost pile to break down for a while first.
  • coffee grounds? yes! coffee grounds are a great addition to your compost pile. In fact, I believe that adding coffee grounds to my indoor compost pile has helped keep the smell down and keep flies away.

Do you have any questions about what you can or can’t compost? Leave them in the comments and I’ll be sure to add them to this list!


*Actually, all that food/organic matter that gets thrown into our landfills is finally being put to use in some places. As the matter breaks down it releases methane, and some landfills are starting to harvest that methane to use for energy. Like the bio-gas I wrote about previously in Michigan’s Green Currents program.

Interested in reading more about compost here on building earth? Check out the compost tag, for all the articles I’ve written on the subject.

Keep up with building earth by following us on facebook, pinterest, or on @buildingearth on instagram

Categories
apartment living living green

Apartment Living

apartment livingI am so excited to own property. I am excited both to indulge my house decorating dreams, and also to invest in a living space that is focused on efficiency and sustainability. I have been excited for this prospect for years, but it hasn’t been in the cards yet. Husby and I are hoping to make an investment in this direction in the next year, but for the past 3 we’ve been happily apartment living. And we’ve been seizing on every opportunity to decrease our negative impact on the earth and increase our positive impact in our small rental space.
While living in a rental unit there are obviously quite a few limitations to our control over our environment. We don’t get a say in how our apartment is heated, or how the water is heated, the quality of the insulation or of our windows, or what materials are used to make improvements or replacements. With limited ability to make an impact in so many of the heavy hitting areas of our living space, we try to so what we can in all of the areas we can control, hoping that the accumulations of our smaller actions will add up.

One of the great features of our apartment we basically lucked into because of what was available at the time. We have fabulous southern and western exposure, and living on the top floor (out of 4) puts us higher than the neighboring buildings. Our windows and high position allow us to take advantage of wonderful sunlight, reducing our reliance on electricity for lighting. In the winter our large windows allow us to take advantage of heat from the sun. This reduces our need to supplement our heat via gas fireplace in an otherwise rather chilly apartment. In the summer our high position  means that we get a pretty decent cross-breeze through open windows, keeping our home a bit cooler than it might otherwise be.

We have been making many other “green” lifestyle choices as renters. We put plastic on our windows in the winter, we unplug unused electronics, we recycle as much as we can, we compost, we support renewable energy, use homemade cleaning solutions, spend our grocery money on organic produce and sustainable, humanely raised meat, buy dry goods in bulk, and reuse often.

I hope to write about many of these topics more in depth in the next few weeks. I think there are never enough resources out there for people interested in improving their impact. Husby and I are always looking for more ways to align our lifestyle with our values and morals, so I’m happy to share what we do with others that feel the same way.

Categories
apartment living living green

On Apartment Composting

apartment copmosting: veggiesLet’s chat about one of my favorite gardening topics: compost. Seriously, how wonderful is it that you can take something you inevitably have if you cook or eat fresh produce – kitchen scraps – and instead of throwing them away, you can turn them into nutrient rich food for the next generation of fresh produce? And it’s a natural process. Depending on your level of patience, there is very little you have to do to go from trash to “black gold”.

One of the greatest things about compost is that it really only requires two things aside from the kitchen scraps – somewhere to keep the scraps as you collect them, and someplace to put the scraps to let them do their thing.

Apartment Composting

Husby and I have been apartment composting for nearly three years. The first six months or so were certainly a learning curve. Previously we had each been living in houses that had their own compost piles, but our apartment does not. Nor does it have a balcony where we could keep our own pile.

Theoretically, you might be able to keep a self contained compost in one of those large plastic storage bins in an apartment. At least that is what the internet will lead you to believe. But we were never able to get it to work. Compost does require some air circulation, and we always ended up with fruit flies in the compost. Just the simple act of opening the bin to add scraps released a gross fleet of little flies. Yuck.

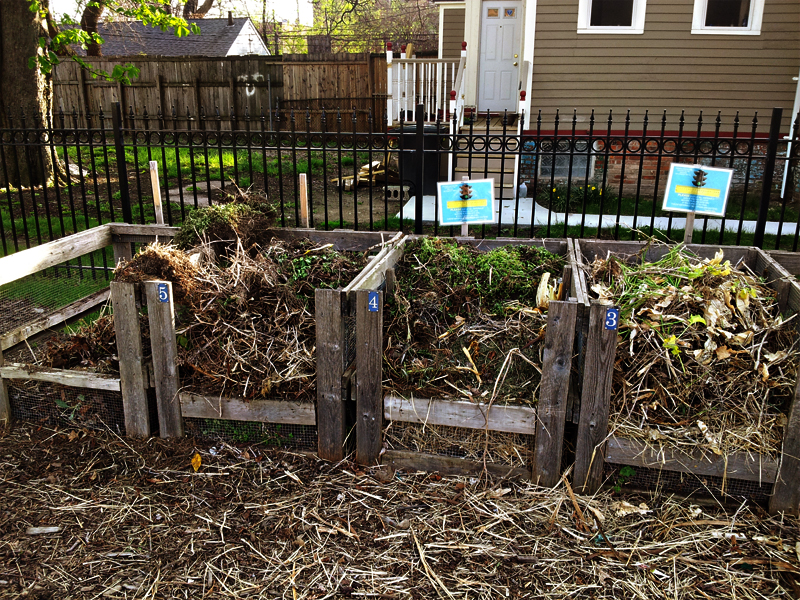
After trying this method out for a couple months and making a couple tweaks to try and control our fruit fly population, we determined that trying to keep our self contained pile was just not an apartment dweller’s reality. We needed another option.  Our immediate solution, which allowed us to continue composting without interruption, was to collect our scraps and bring them out to husby’s family’s house, where his mom kept a compost pile. After a couple months we made connections with the neighborhood community garden, and made arrangements to add our scraps to their compost pile. For the past few years, every time we have a full container of kitchen scraps we bring them to the community garden. Since then, more and more community gardens have started in our neighborhood, so we, and our fellow apartment dwellers in midtown Detroit, have plenty of places to bring our kitchen scraps.

apartment composting: bins

As far as how we keep our scraps in between trips to the compost pile, we certainly don’t use anything fancy. We just keep them in a plastic mixing bowl, and keep the bowl in the refrigerator to keep the smell down and the flies away.  No need for any specific composting container. No real need for a lid even.  We are easily able to keep scraps for two weeks between  taking out the compost.  In the summer we tend to empty our bowl more frequently, but that is mostly because we are using more fresh produce so we have more scraps in a shorter amount of time, and also because we are making frequent trips to the garden anyway to water or weed our garden plot.

So if you’re living in an apartment and want to compost, find yourself a local community garden and see if they will let you contribute to their pile. Then get yourself a bowl and start collecting.